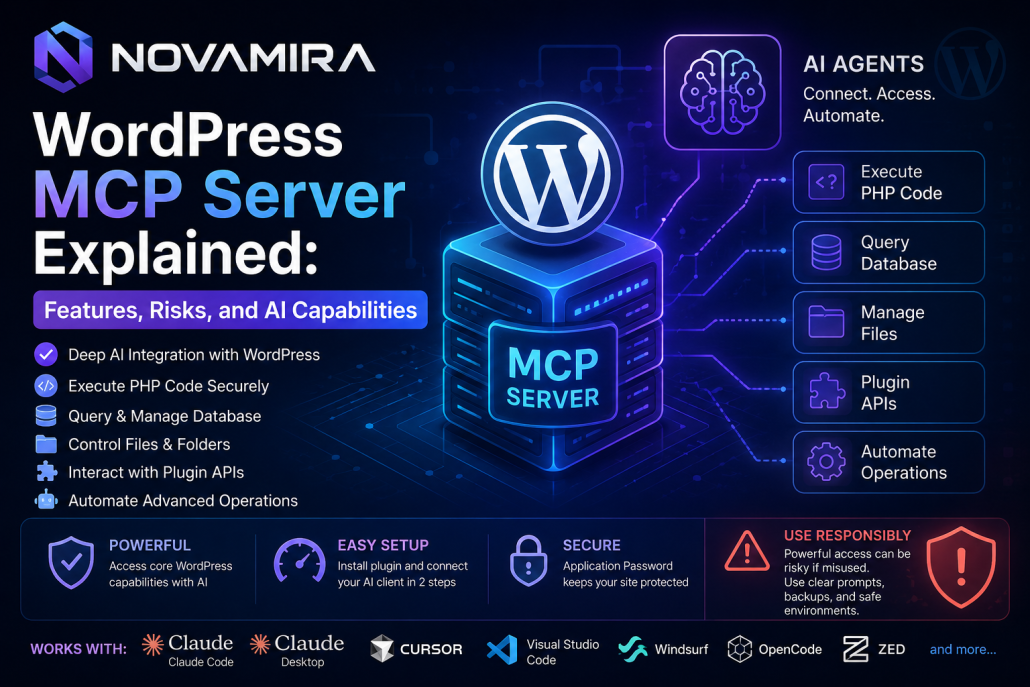
functions, or perform actions that the website owner does not want.
Poorly written prompts or unrestricted permissions may cause
unwanted modifications inside the WordPress environment.
For this reason, users should always provide clear and controlled
instructions to AI agents. It is highly recommended to use backups,
staging environments, restricted permissions, and careful supervision
before enabling advanced AI automation on live production websites.
Novamira represents a major step forward in AI-
powered WordPress development by combining open-
source flexibility, MCP compatibility, deep WordPress
integration, and intelligent automation into a single
platform.
https://kiaapp.xyz/wp-content/uploads/2025/09/favicon2-4-300x200.png00Kiahttps://kiaapp.xyz/wp-content/uploads/2025/09/favicon2-4-300x200.pngKia2026-06-08 11:28:302026-09-17 21:38:55Novamira WordPress MCP Server Explained: Features, Risks, and AI Capabilities
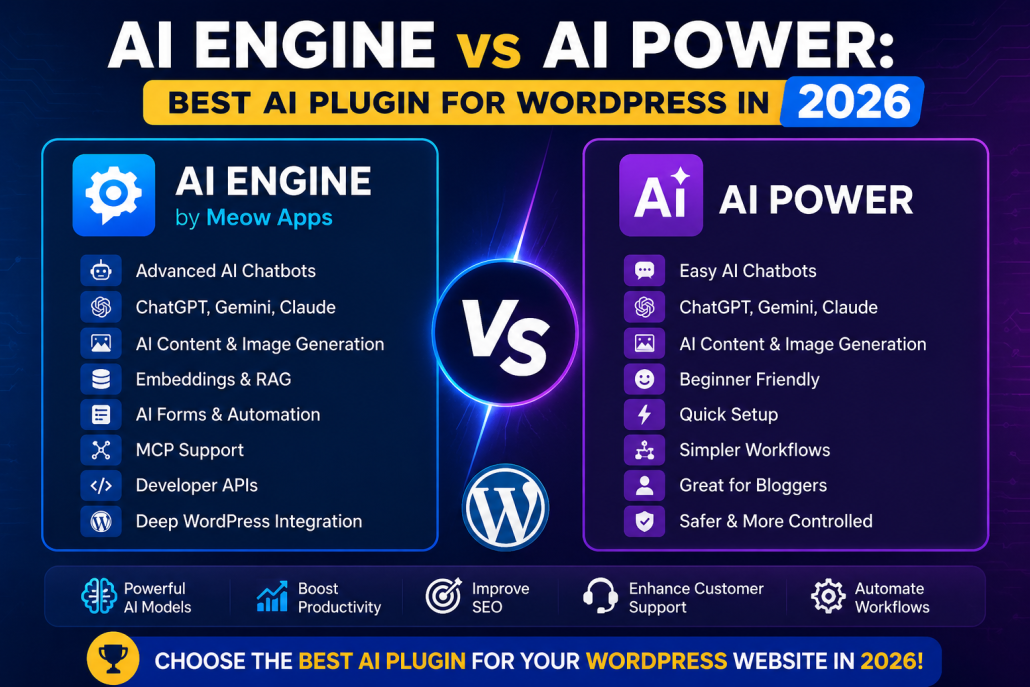
Meow Apps is a well-known WordPress development company recognized for creating advanced artificial intelligence tools for modern websites. The company is best known for developing AI Engine, one of the most powerful AI plugins for WordPress. Meow Apps focuses on integrating modern AI technologies such as ChatGPT, Google Gemini, Claude AI, image generation, embeddings, automation, and intelligent workflows directly into WordPress websites. Its tools are designed for developers, businesses, bloggers, and website owners who want to bring artificial intelligence into content creation, customer support, SEO optimization, and website automation.
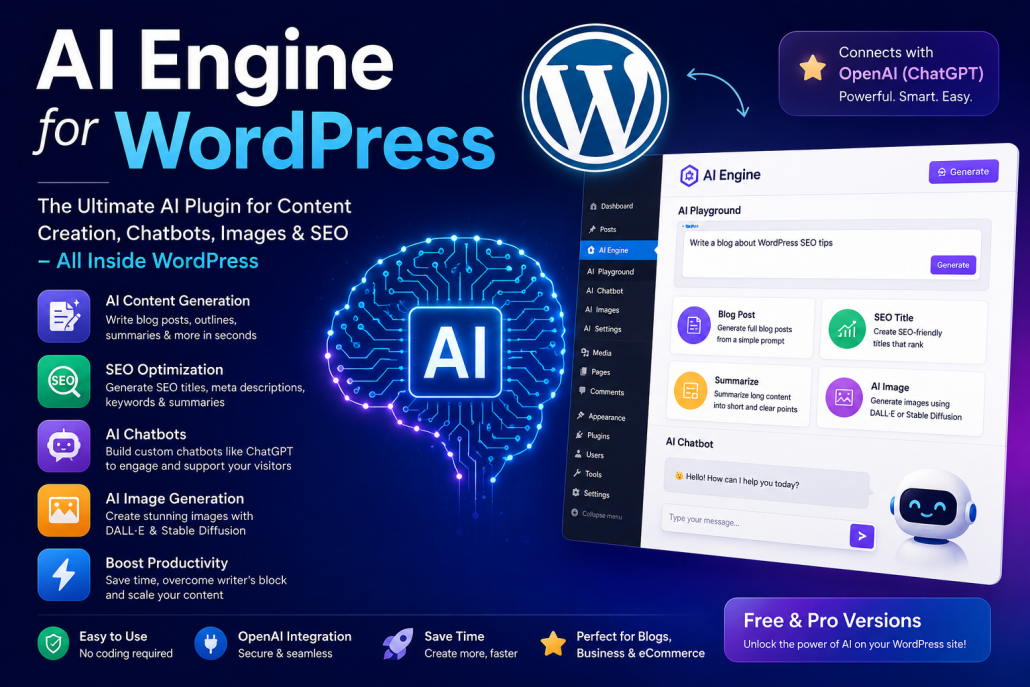
AI Engine, developed by Meow Apps, is an advanced AI plugin for WordPress that transforms websites into intelligent AI-powered platforms. The plugin supports OpenAI models like ChatGPT and GPT APIs, Google Gemini, Anthropic Claude, and several other modern AI systems. AI Engine allows users to create AI chatbots, generate SEO-friendly articles, produce AI-generated images, build custom AI forms, and automate content workflows directly inside the WordPress dashboard. One of its strongest features is support for embeddings and Retrieval-Augmented Generation (RAG), enabling websites to build intelligent knowledge bases and context-aware AI assistants. AI Engine also provides extensive developer APIs, deep WordPress integration, and support for MCP (Model Context Protocol), making it highly attractive for developers and advanced AI projects.
AI Power is another popular WordPress AI plugin that competes with AI Engine in the growing AI website ecosystem. AI Power focuses more on simplicity, beginner-friendly setup, and fast AI content creation for bloggers, marketers, and general website owners. Similar to AI Engine, it supports OpenAI, Google Gemini, and Claude AI models while offering chatbot functionality, AI content generation, and AI image creation tools. However, AI Power provides a more simplified experience with fewer advanced developer tools and less complex AI workflow customization.
When comparing AI Engine and AI Power, both plugins provide strong AI chatbot capabilities, AI-assisted content generation, AI image creation, and support for modern AI models such as ChatGPT, Gemini, and Claude. However, AI Engine stands out because of its deeper WordPress integration, advanced automation features, extensive APIs, and stronger embeddings and RAG support. This allows developers to create more intelligent and scalable AI systems directly inside WordPress websites. AI Power, on the other hand, prioritizes ease of use and simplified AI functionality, making it more suitable for users who want quick AI integration without advanced configuration.
AI Engine is generally considered the better solution for developers, AI enthusiasts, automation projects, and websites requiring advanced AI functionality. Because it provides deeper system access and more powerful automation tools, careful configuration is recommended on live production websites. AI Power is often considered safer and easier for beginners because it offers more controlled functionality with fewer advanced system-level features. Ultimately, AI Engine is ideal for advanced AI integration and custom WordPress development, while AI Power is best suited for bloggers, marketers, and users seeking simple AI-powered website tools.
https://kiaapp.xyz/wp-content/uploads/2025/09/favicon2-4-300x200.png00Kiahttps://kiaapp.xyz/wp-content/uploads/2025/09/favicon2-4-300x200.pngKia2026-06-08 09:25:222026-09-16 23:03:13AI Engine vs AI Power: Best AI Plugin for WordPress in 2026
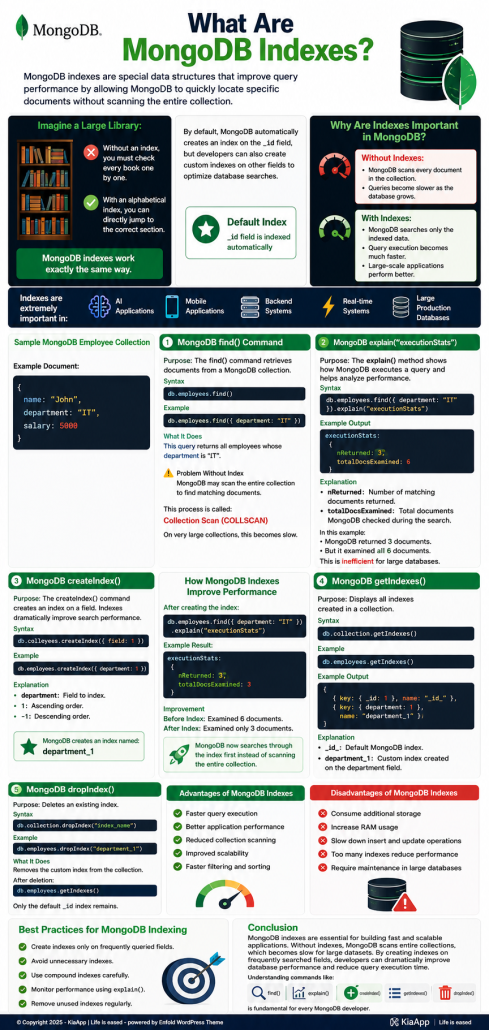
MongoDB now searches through the index first instead
of scanning the entire collection.
⸻⸻⸻
4. MongoDB getIndexes()
Purpose
Displays all indexes created in a collection.
Syntax
db.collection.getIndexes()
Example
db.employees.getIndexes()
Example Output
[
{ key: { _id: 1 }, name: “_id_” },
{ key: { department: 1 }, name: “department_1” }
]
Explanation
* _id_
* Default MongoDB index.
* department_1
* Custom index created on the department field.
⸻⸻⸻
5. MongoDB dropIndex()
Purpose
Deletes an existing index.
Syntax
db.collection.dropIndex(“index_name”)
Example
db.employees.dropIndex(“department_1”)
What It Does
Removes the custom index from the collection.
After deletion:
db.employees.getIndexes()
Only the default _id index remains.
⸻⸻⸻
Advantages of MongoDB Indexes
* Faster query execution
* Better application performance
* Reduced collection scanning
* Improved scalability
* Faster filtering and sorting
⸻
Disadvantages of MongoDB Indexes
* Consume additional storage
* Increase RAM usage
* Slow down insert and update operations
* Too many indexes reduce performance
* Require maintenance in large databases
⸻⸻⸻
Best Practices for MongoDB Indexing
* Create indexes only on frequently queried fields.
* Avoid unnecessary indexes.
* Use compound indexes carefully.
* Monitor performance using explain().
* Remove unused indexes regularly.
⸻⸻⸻
Conclusion
MongoDB indexes are essential for building fast and scalable applications. Without indexes, MongoDB scans entire collections, which becomes slow for large datasets. By creating indexes on frequently searched fields, developers can dramatically improve database performance and reduce query execution time.
Understanding commands like:
* find()
* explain()
* createIndex()
* getIndexes()
* dropIndex()
is fundamental for every MongoDB developer.
https://kiaapp.xyz/wp-content/uploads/2025/09/favicon2-4-300x200.png00Kiahttps://kiaapp.xyz/wp-content/uploads/2025/09/favicon2-4-300x200.pngKia2026-06-07 22:29:352026-09-17 21:30:31MongoDB Indexing Explained: Create, Use, and Delete Indexes in MongoDB
Cons: Eye strain, isolation. I use 20-20-20 rule (every 20 min, look
20 ft away for 20 sec), daily walks, video calls home.
Inspo Quote: “Code is poetry” – I turn pixels into purpose. What’s next for me?
https://kiaapp.xyz/wp-content/uploads/2025/09/favicon2-4-300x200.png00Kiahttps://kiaapp.xyz/wp-content/uploads/2025/09/favicon2-4-300x200.pngKia2026-05-17 10:05:312026-09-24 14:31:46Coding, My New Homeland: How Dev Beats Homesickness
A Modern Nomad’s Story I sit glued to the screen, pouring my lifetime into app development, web dev, and translating. But here’s the magic: it’s not just work; it’s my personal sanctuary against homesickness. Away from home? No problem – code becomes my homeland!
Why This “Screen Life” Heals My Heart:
Flow State Magic: Building apps/websites = total immersion. Time flies, worries fade. Psychologists call it “flow” – pure joy in creation!
Global Connections: Translating links me to cultures (Iran? World?). Web dev deploys sites seen by thousands – feels like “home” reaching everywhere.
Achievement High: Deploy an app → Instant dopamine! Beats scrolling social media for nostalgia.
Flexible Freedom: Work from anywhere (coffee shop, hotel). Homesick? Code a family chat app!
Cons: Eye strain, isolation. I use 20-20-20 rule (every 20 min, look 20 ft away for 20 sec), daily walks, video calls home.
Inspo Quote: “Code is poetry” – I turn pixels into purpose. What’s next for me?
https://kiaapp.xyz/wp-content/uploads/2025/09/favicon2-4-300x200.png00Kiahttps://kiaapp.xyz/wp-content/uploads/2025/09/favicon2-4-300x200.pngKia2026-05-16 18:35:472026-09-17 22:59:14When Code Becomes Home: A Web Developer and Translator’s Journey
I spend much of my time in front of a screen, working on app development, web development, and translation. But for me, technology is more than just work. It has become a creative space where I can focus, build, learn, and feel at home—even when I am far from home.
When everything around me feels unfamiliar, coding gives me something familiar to return to. A new Flutter project, a SwiftUI interface, or a challenging problem can quickly pull my attention away from homesickness and toward creating something useful.
Why This “Screen Life” Helps Me
Finding Flow: When I am deeply involved in building an app or website, hours can pass without me noticing. Solving problems and seeing an idea gradually become a working product gives me a strong sense of purpose.
Staying Connected: Technology has no real borders. Through development and translation, I can work with ideas, people, and cultures from different parts of the world. Even when I am physically far from home, I still feel connected.
The Satisfaction of Building: There is something special about turning an idea into a functioning application. Every feature completed and every problem solved provides a small sense of achievement.
Freedom to Work Anywhere: Development gives me flexibility. Whether I am working from home, a café, or another country, my laptop provides a familiar workspace.
More Than Just Work
Coding has gradually become part of my daily routine and identity. SwiftUI gives me the tools to create native iOS experiences, while Flutter allows me to build applications across platforms. Backend technologies and databases such as MongoDB help transform those interfaces into complete products.
Every project brings a new challenge: an interface to improve, an API to connect, a bug to solve, or a feature to design. That constant process of learning keeps me moving forward.
Keeping a Healthy Balance
Of course, spending long hours at a computer has disadvantages. Eye strain, too much sitting, and isolation are real concerns.
I try to balance screen time with regular breaks, walking, exercise, and conversations with family and friends. I also use the 20-20-20 rule: roughly every 20 minutes, I look at something about 20 feet away for at least 20 seconds.
Technology works best for me when it supports life rather than replacing it.
Turning Pixels Into Purpose
There is a well-known expression in the programming world: “Code is poetry.”
For me, that idea goes beyond writing elegant software. Coding gives structure to ideas and turns imagination into something people can actually use.
Being away from home can sometimes be difficult, but development has given me a portable creative space—a place where I can continue learning, building, and moving forward.
Wherever I open my laptop, there is another problem to solve and another idea waiting to become real.
https://kiaapp.xyz/wp-content/uploads/2025/09/favicon2-4-300x200.png00Kiahttps://kiaapp.xyz/wp-content/uploads/2025/09/favicon2-4-300x200.pngKia2026-05-16 18:27:572026-09-24 14:04:00Coding, My New Homeland: How Dev Beats Homesickness
MongoDB CRUD Operations: A Practical Beginner’s Guide
Most applications need to store information, retrieve it, change it, and remove it. These four activities are known as CRUD: Create, Read, Update, and Delete.
This tutorial introduces MongoDB CRUD operations through a small practice database. You’ll create user records, search documents, update nested fields, and delete selected data.
Before You Begin
You need access to a running MongoDB server and the MongoDB Shell, mongosh. The examples below are shell commands, rather than code for a Node.js application.
For a local server running on the default port, open your terminal and connect with:
mongosh "mongodb://localhost:27017"
For MongoDB Atlas, use the shell connection instructions provided by your cluster. The server must be available before you can connect. MongoDB Shell documentation
Use a new practice database for these examples. Run each insertion once so you don’t create duplicate sample records.
Understand MongoDB’s Structure
MongoDB organizes data into databases, collections, and documents:
A database holds collections.
A collection holds documents.
A document contains fields and values, including nested objects and arrays.
For example, a blogging application might store user profiles in a users collection and articles in a posts collection.
Select a practice database:
use crud_practice
This selects the database even if it does not exist yet. MongoDB creates it when you first store data. A collection can also be created automatically by the first insertion. Databases and collections
The filter selects the user. The update changes only address.city, preserving address.street.
Verify the change:
db.users.findOne({
  email: "alex@example.com"
})
The address should now contain:
{
  city: "Austin",
  street: "Wall Street"
}
Avoid Replacing an Embedded Document Accidentally
These two update expressions have different effects.
Updating one nested field:
{ $set: { "address.city": "Austin" } }
Replacing the entire address value:
{ $set: { address: { city: "Austin" } } }
The second expression removes the existing street field because the new address object contains only city.
An update result reports matchedCount and modifiedCount. A document may match without being modified if it already contains the requested value. MongoDB updateOne() reference
Fields omitted from the replacement are removed. The existing _id is preserved when it is omitted from the replacement document. MongoDB replaceOne() reference
Query Arrays and Select Returned Fields
Create a few sample posts:
db.posts.insertMany([
  {
    title: "Learning MongoDB",
    body: "An introduction to document databases.",
    author: "Alex",
    tags: ["mongodb", "learning"]
  },
  {
    title: "Swimming Basics",
    body: "Tips for beginner swimmers.",
    author: "Sam",
    tags: ["swimming", "fitness"]
  },
  {
    title: "Weekend Activities",
    body: "Ideas for an active weekend.",
    author: "Jamie",
    tags: ["swimming", "travel"]
  }
])
Match an Array Element
To find posts containing "swimming" in their tags:
db.posts.find({
  tags: "swimming"
})
This matches the second and third posts even though their arrays contain additional values.
To match an array containing exactly one element, "swimming", use:
db.posts.find({
  tags: ["swimming"]
})
That query matches none of these sample posts. Equality against an array requires the same elements in the same order. MongoDB array queries
Return Only Selected Fields
A projection controls which fields appear in query results.
Here, author: 1 includes the author field, and _id: 0 excludes the identifier. _id is included by default unless explicitly excluded. MongoDB projection documentation
If you followed the tutorial in order, this removes Sam. Alex remains because his status is "single".
An empty filter passed to deleteMany() removes every document in the collection. Always check the filter before running a deletion. MongoDB deletion reference
CRUD Method Reference
Operation
Method
Purpose
Create
insertOne()
Insert one document
Create
insertMany()
Insert multiple documents
Read
find()
Retrieve matching documents
Read
findOne()
Retrieve one matching document
Update
updateOne()
Update one matching document
Update
updateMany()
Update matching documents
Update
replaceOne()
Replace one matching document
Delete
deleteOne()
Delete one matching document
Delete
deleteMany()
Delete matching documents
Practice Exercise
Create a separate products collection and practice the same workflow:
Insert three products with names, prices, and category arrays.
Find products belonging to one category.
Update one product’s price using $set.
Return only product names and prices with a projection.
Inspect a selected product, then delete it.
This exercise connects the individual commands into a workflow you can reuse when building an application.
Hi everyone. In this session, we’re going to take a
simple and practical look at MongoDB Compass and
understand what it is and how it helps us work more
comfortably with databases.
MongoDB Compass is the official graphical interface
for MongoDB. Instead of typing commands in the
terminal, you get a visual environment where you can
explore databases, open collections, insert documents,
run queries, and filter data. It makes working with
MongoDB much easier, especially if you prefer seeing
your data structured on the screen rather than
interacting purely through command lines.
To get started, you can download MongoDB Compass
directly from the MongoDB website under the Tools
section. Just choose the stable version for your
operating system — for example, an .exe file for
Windows — install it like any other application, and
you’re ready to connect.
When you open Compass, you’ll see a connection
string (URI). If MongoDB is installed locally, it
usually points to localhost, which means it connects to
the MongoDB server running on your own computer.
You can simply click “Connect” to access your
databases.
After connecting, you’ll see a list of databases on the
left. By default, MongoDB creates three system
databases:
admin
config
local
Any additional databases are ones you’ve created
yourself.
For example, suppose we open a database called
invent. Inside it, you may find several collections. In
MongoDB, a collection is similar to a table in
relational databases. If you ever need to delete a
collection, you can use the “Drop Collection” option
and confirm the action — the change happens
immediately.
Now imagine creating a new database called demoDB
with a collection named demoCollection. Once created,
you can begin inserting documents right away.
MongoDB stores data in BSON (Binary JSON), so
documents look like JSON objects. Let’s say we’re
building a small course database instead of a book
database. A sample document could look conceptually
like this:
title: “Mastering Flutter Development”
instructor: “Kia Malek”
durationHours: 42
level: “Intermediate”
tags: [“Flutter”, “Mobile”, “UI Design”]
When you insert this document, MongoDB
automatically generates an _id field. Even if you don’t
define it, MongoDB creates it for you. This _id
uniquely identifies each document in the collection and
ensures every record can be referenced individually.
You can insert multiple documents into a collection,
and each becomes a separate record. Compass allows
you to edit, clone, delete, or export documents directly
through its interface buttons.
Filtering is one of the most powerful features in
Compass. At the top of the documents view, there’s a
filter bar. For example, if you want to find all courses
labeled as “Intermediate,” you could type:
{ level: "Intermediate" }
and click “Find.” Compass will instantly display only
the matching documents.
If Compass fails to connect — especially when
working locally — check whether your MongoDB
server is running. On Windows, you can open the
Services app and ensure that the MongoDB Server
service is active. If it’s stopped, simply start it.
Overall, MongoDB Compass is a powerful yet
beginner-friendly tool. It helps you visualize your
database structure, test queries, manage collections,
and better understand how your data is organized —
without relying entirely on the command line.
If you’re new to MongoDB, spend some time
experimenting with Compass. Create databases, insert
sample documents, apply filters, and explore the
interface. The more you practice visually, the clearer
MongoDB concepts will become.
https://kiaapp.xyz/wp-content/uploads/2025/09/favicon2-4-300x200.png00Kiahttps://kiaapp.xyz/wp-content/uploads/2025/09/favicon2-4-300x200.pngKia2026-02-27 11:35:342026-09-17 20:58:03MongoDb Compass Introduction – The GUI for MongoDB
Today we’re going to talk about one of the most important concepts in Flutter: the difference between Stateless and Stateful widgets. These are two of the most common widget types you’ll work with while developing Flutter apps. If you’ve ever created a new Flutter project, you’ve already seen them in the default counter example.
So what exactly are they? In simple terms, these two widgets control whether the UI can change during the lifetime of the app. A StatelessWidget is defined as a widget that does not require mutable state. A StatefulWidget, on the other hand, is a widget that does have mutable state. The word “mutable” simply means something that can change. So when we say a widget has mutable state, we mean it can update dynamically while the app is running. A stateless widget cannot change on its own once it has been built.
To make this clearer, let’s walk through a simple example: a coin flip app. The app will display whether the coin is “Heads” or “Tails” in the app bar, and it will have a floating action button at the bottom that flips the coin when pressed. This small example clearly demonstrates the difference between stateless and stateful widgets.
We begin by creating a basic app structure with a MaterialApp and a Scaffold. Inside the Scaffold, we add an AppBar with a title that says, “The coin is …” followed by either Heads or Tails. To decide which one to show, we use a simple integer variable called coinHead and a ternary operator (a shortened if–else statement). If coinHead equals 1, we display “Heads.” Otherwise, we display “Tails.” Since we initially set coinHead to 0, the app shows “Tails” when it first runs.
Next, we add a floating action button. When pressed, it should randomly generate either 0 or 1 using Dart’s math library. In the console, we can see the value switching between 0 and 1 each time we press the button. However, something interesting happens: even though the value changes internally, the app bar text does not update. It continues to show “Tails,” even when the random number becomes 1.
At this point, we might think to use setState() to trigger a rebuild. But when we try to use setState() inside a StatelessWidget, we get an error. The message tells us that setState is not defined for this class and that the widget is marked as immutable. In other words, a StatelessWidget is not allowed to change after it has been created. That’s the key limitation.
The solution is simple: convert the widget from stateless to stateful. Both Android Studio and VS Code make this easy with a quick refactor option. Once the widget becomes a StatefulWidget, we can wrap our state changes inside setState(). Now, every time we press the button, the random value updates and the UI rebuilds. The app bar correctly switches between “Heads” and “Tails.”
In summary, use a StatelessWidget when your UI does not need to change after it is built. Use a StatefulWidget when your UI depends on values that can change over time. While the concept can become more advanced as your apps grow, this simple coin flip example gives you a solid foundation for understanding how state works in Flutter.
https://kiaapp.xyz/wp-content/uploads/2025/09/favicon2-4-300x200.png00Kiahttps://kiaapp.xyz/wp-content/uploads/2025/09/favicon2-4-300x200.pngKia2026-02-27 10:53:252026-09-17 22:06:27Stateless vs Stateful for Flutter Example