
Deploying and Connecting the i9 AI Agent to WordPress
I created my i9 AI Agent with Python and Google ADK. It uses MongoDB as its NoSQL database. After testing the agent on my Mac, I prepared it for uploading to my host.
First, I put all the project files in one folder and compressed the folder as a ZIP file. I did not include my API keys or passwords in the ZIP file because this information must stay private.
Next, I opened cPanel and went to File Manager. I uploaded the ZIP file to the correct folder and extracted it. Then, I configured the Python application, installed the required packages, and added the API key as an environment variable. After starting the application, my agent received a public HTTPS link.
To connect the agent to my WordPress website, I entered the WordPress dashboard. Then, I went to Appearance → Menus.
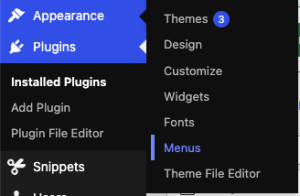
Go to Appearance and select Menus in the WordPress dashboard.
I selected Custom Links, entered the agent’s public link, and used AI Agent for i9 as the navigation label. Finally, I added it to the menu and clicked Save Menu.
Now visitors can open and use my AI shopping assistant directly from the website menu.
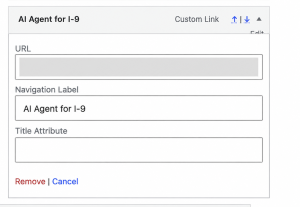
Add the agent’s public URL and enter “AI Agent for i9” as the navigation label.