
This AdMob tutorial explains how to add an app to your AdMob account, which is the first essential step to start earning money from ads. An important point is that you can add both published and unpublished apps. If you register an app as unpublished, you can later link it to its official store page at any time. The tutorial is structured around three main parts:
- adding a published app,
- adding an unpublished app, and
- creating an ad unit.
Scenario 1: Your app is already published (Google Play or App Store)
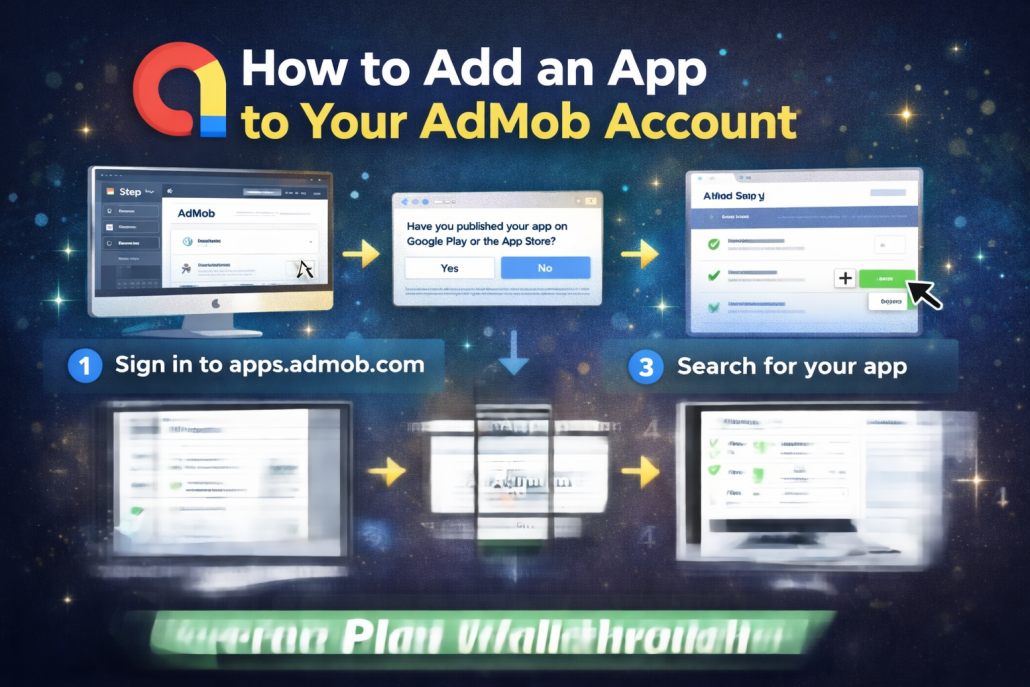
First, sign in to your AdMob account at apps.admob.com. From the left sidebar, click Apps, then select the blue Add App button. A dialog will ask whether your app is published on Google Play or the App Store—here you choose Yes. Enter your app’s name, click Search, find your app in the results, and click Add next to it. With that, your app is successfully added to your AdMob account.
After adding the app, the next step is creating an Ad Unit, which is the placement inside your app where ads appear. Click Create Ad Unit, choose one of the available ad formats—Banner, Interstitial, Rewarded, or Native—then give the ad unit a clear, recognizable name and click Create Ad Unit. AdMob will then show you instructions on how to integrate the ad unit into your app, and you can also email these instructions to yourself or a teammate. Before showing real ads, it’s strongly recommended to test everything using test ads.
Scenario 2: Your app is not published yet
Even if your app hasn’t been released on an app store, you can still add it to AdMob to prepare and test ads. The process is very similar: sign in to AdMob, go to Apps, click Add App, and this time answer No when asked if the app is published. You’ll then provide basic details such as the app name and platform (Android or iOS) and click Add. After that, you can create ad units in exactly the same way as with a published app.
If you later publish the app and want to link the previously unpublished entry to its store listing, go to Apps, select the unpublished app, open App Settings, and edit the App name & store link section using the pencil icon. Choose to link the app to Google Play or the App Store, search for the app by name, select it from the results, and confirm by clicking Link App. Keep in mind that newly published apps may take a few days to appear in search results, and this linking action cannot be undone—so accuracy is important.
Scenario 3: Creating an ad unit for an app already in your account
To add another ad unit to an app you’ve already set up, sign in to AdMob, select the app under Apps, go to Ad Units, and click Get Started (or Add Ad Unit if you already have some). Choose the ad format, name the unit, and click Create Ad Unit. As before, AdMob provides integration instructions, and you should test the setup with test ads before going live.
In closing, the tutorial emphasizes reviewing additional resources for best results and following the AdMob channel for more tips and strategies to improve app monetization.